Since I’ve started using Mari I’ve been using geometry with multiple uv tiles more and more. Here is are the steps I use to hookup my textures in Maya:
So you’ve got a model with multiple uv tiles and corresponding texture maps for each tile. Your model is in maya and you’re ready to setup your shading network.

First you’ll want to create a layered texture node. Create enough layers equal to the number of patches you have (in this case 3). Import your texture files and in the layered texture node set the blend mode for each layer to Add.

Now move onto the File nodes. For each texture file in the Color Balance section of the File Node bring the Default Color all the way down to black. This allows the add function on the layered texture to work properly.

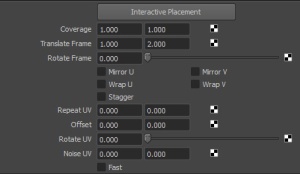
Now in the placement node for each texture you need to give the position of where that particular image resides in uv space. In my example the tiles I want are 0,2 1,2 2,2:

So for the 1,2 texture I want my placement node to look like this:

Also note that in each placement node you’ll want to turn off the Wrap U and the Wrap V.
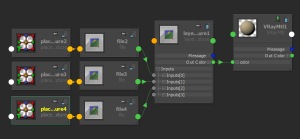
You’ll end up with a shading network that looks something like this:

And your model should be good to go:


