Maya Particles with PerParticle Unique Geometry

Recently I’ve been doing a lot of cg rain enhancement to shots, and generally not super happy with the results. After reading this paper and this one by Kshitiz Garg and Shree K. Nayar, I’ve started using unique textures for my rain drops instead of generic ‘streaks’. So I needed to be able to assign random textures to instanced Geo on a PerParticle basis in Maya. I couldn’t use Sprites because they always orient themselves to the camera which wouldn’t work for looking up at the rain or down thru the rain etc. The Particle instancer is pretty easy to use if you’re using a geo sequence or only using one piece of geo on all the particles. The process for achieving random geo PerParticle is a little convoluted so I thought I’d write it up for my own benefit and for anyone else looking for the way to achieve this.

One note: I’m not so much a dynamics artist so this’ll be pretty rudimentary if you are.
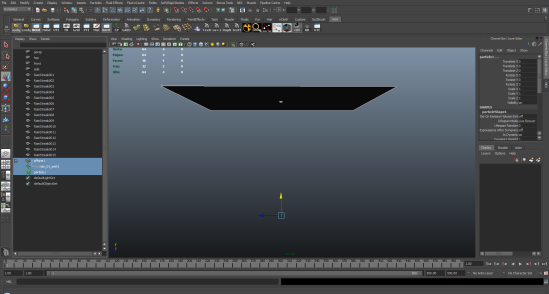
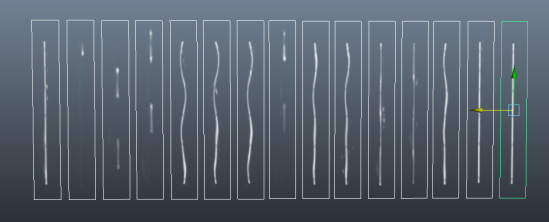
01: Create all of your geometry you’d like to instance to your particles and assign materials to those models. In my case I have 15 rainstreak poly plane models with unique rain drop textures applied.
02Textures
02: Create your particle system. I’m going to be emitting from a large polyplane. So first I create the surface to emit from and position it. Then create my particle system.
03Surface
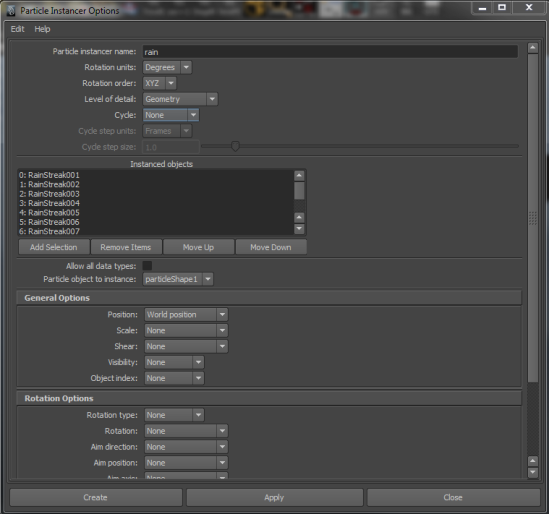
03: Create your instancer: Select all your geo that you want to instance to the particles. Then in the Particle menu select: Instancer Replacement (options). The only change you need to make in the dialog is to enable “Allow all data types”.
04Instancer
04: On the particle node you need to create a new general dynamic attribute. Give it a name, I’m using ‘RandomGeo’ be sure ‘per-particle float’ is selected.
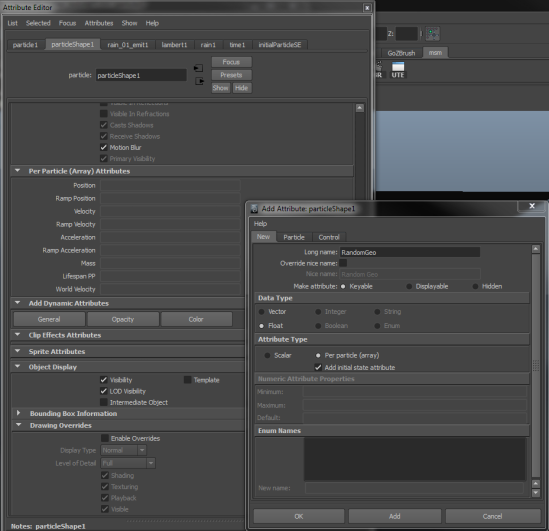
05AddAttribute
05: Now on your particle node under the perParticle (array) attributes you should see the attribute you just created. RightClick in there and create expression.
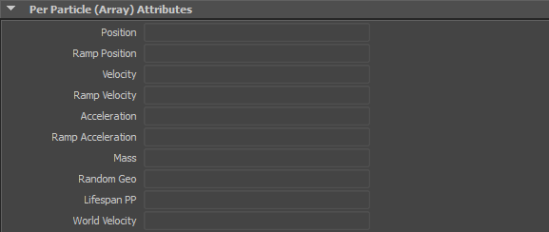
06PerParticleAttribute
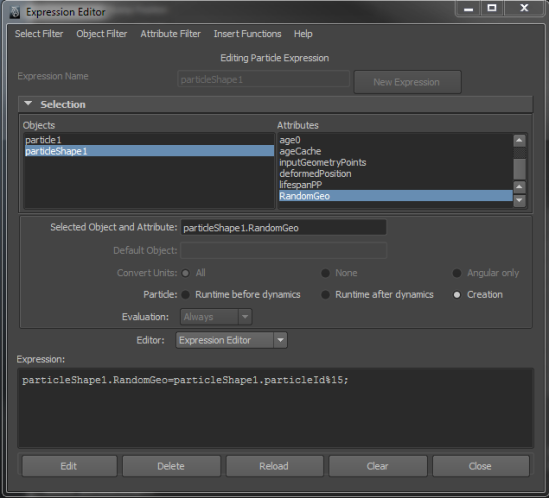
06: The expression should be: particleShape1.attribute = particleShape1.id%number;
Where attribute is the PerParticle attribute you created, in my case ‘RandomGeo’ and Where number is the number of objects in your instancer, in my case 15.
07Expression
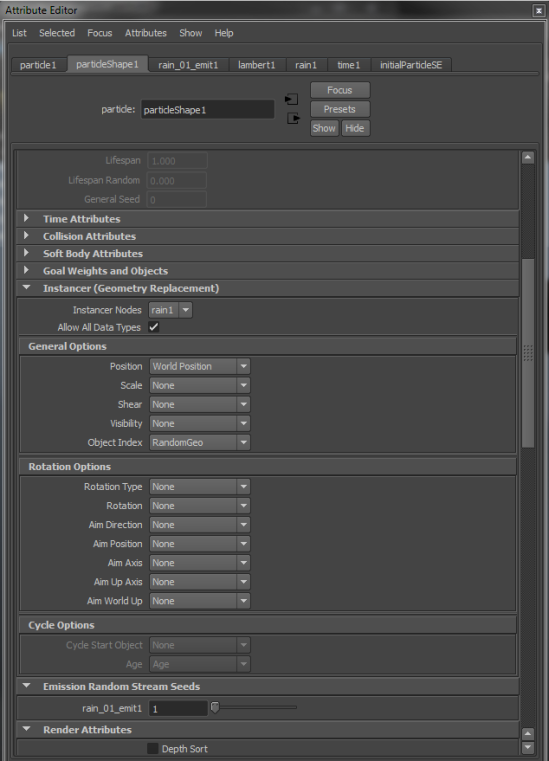
07: Now still on the particle node under instancer be sure ‘Allow All Data Types’ is checked. And in general options: Under the Object Index pulldown you need to select your PerParticle attribute.
 08ParticleNode
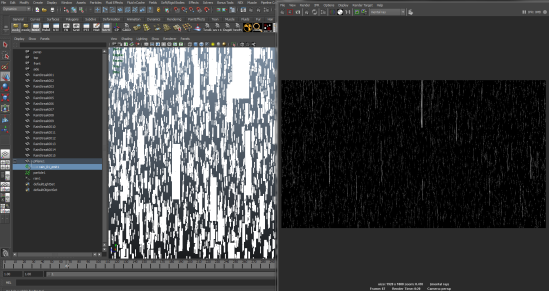
That’s it. Now you can tune you emitter and dynamics settings and render.
09Done

Off Topic – Data rescue

A hard-drive of mine ‘died’, I’m pretty sure that some of the sectors went bad, enough was wrong with it where it wouldn’t mount anymore. This hard-drive happened to be filled with all of my wife’s videos of our son so needless to say I was very motivated to recover what I could from it. At the same time I didn’t want to spend any money on data recovery software. So after much googling and forum reading I found the following method. I’m posting it here because in order to get this to work I had to combine the instructions of about 4 different people, so maybe someday someone will find this post and it’ll save them the 6 hours I spent figuring it out. That being said I’m pretty clueless when it comes to Linux so someone with more experience probably already knows all this. This also assumes you’re not already running Linux in which case there is no need for the KNOPPIX cd.

You’ll need the following:

  1. Your bad hard-drive
  2. Another empty drive that is at least as large as the bad drive
  3. The KNOPPIX Live CD
  4. An internet connection

Now do the following:

  1. Connect your bad drive and your rescue drive to your computer.
  2. Boot from the KNOPPIX CD you downloaded and burned to disk.
  3. Launch the terminal.

Ok now you’re going to enter in a bunch of terminal commands, all this getting ready for the repair process should take 10-15 min depending on your internet speed. Each line that follows is a separate terminal command to enter.

  1. sudo -s
  2. sudo apt-get update
  3. sudo apt-get -t testing install g++
  4. mkdir /home/knoppix/test
  5. cd /home/knoppix/test
  6. wget http://download.savannah.gnu.org/releases/ddrescue/ddrescue-1.8.tar.bz2
  7. tar xjf ddrescue-1.8.tar.bz2
  8. cd ddrescue-1.8
  9. ./configure
  10. make
  11. sudo make install
  12. sudo apt-get -t testing install info
  13. info -f /usr/local/share/info/ddrescue.info

You’ve just updated the compiler, created a folder to use to download to, and downloaded ddrescue the application you’ll use to transfer your data from your good disk to your bad disk. If you’d like to read the ddrescue  manual you can find it here. For my purposes I found instructions for using ddrescue that seemed to apply to my case, your drive issue may necessitate a different use of ddrescue.

Now you’re ready to transfer your data. What should happen here is that ddrescue will first transfer all the easily read data from the bad drive to the new one. Then when that’s done and you enter the second command, ddrescue goes back to the trouble sectors and attempts to recover as much as possible from those areas. If you’re not sure of the names of your drives, use the KNOPPIX file browser and in the navigation bar the drive will say something like /media/sde1. The name you want to extract from that info is ‘sde’ which is the name you’ll use in the following commands. Of course yours will be different and you’ll need the name of the old ‘bad’ drive and the new drive.

  1. ./ddrescue -n /dev/old_disk /dev/new_disk rescued.log
  2. ./ddrescue -r 1 /dev/old_disk /dev/new_disk rescued.log

So know you can go see how much data you’ve recovered on your new good drive. That’s it. I hope this helps someone.

Mari Texturing Challenge

Recently finished an entry for the CGSOCIETY Mari Texturing Challenge

While I lost some steam and got busy at work near the end of the contest I’m fairy happy with the results. In Hindsight I probably spent too much time concerned with the overall scene when I could have focused more on the texture painting.

I’m definitely getting  more comfortable with Mari which I’m loving so the challenge was a valuable learning experience on that end. The whole piece allowed me to further refine my personal pipeline which I plan on writing a large post about here soon.

How to fix a Corrupt Vray Frame-Buffer

So occasionally the Vray frame-buffer gets screwed up. Sometimes you’ll lose the frame-buffer window off screen and you can’t get it back, sometimes the frame-buffer completely crashes Maya with a ‘fatal error’.

Here’s how I fix this issue

  1. Save your Maya scene file as Maya ASCII.
  2. Open the ASCII file in a text editor. Vim handles very large text files easily and is available on all platforms.
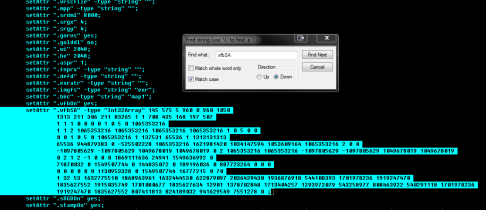
  3. Search for ‘.vfbSA’ in the ASCII file.
  4. Select and delete the entire setAttr entry. Like so:

Image

5. Save the ASCII file and open the scene in Maya.
6. Fixed!

Multi-Tile UV workflow in Maya

Since I’ve started using Mari I’ve been using geometry with multiple uv tiles more and more. Here is are the steps I use to hookup my textures in Maya:

So you’ve got a model with multiple uv tiles and corresponding texture maps for each tile. Your model is in maya and you’re ready to setup your shading network.

First you’ll want to create a layered texture node. Create enough layers equal to the number of patches you have (in this case 3). Import your texture files and in the layered texture node set the blend mode for each layer to Add.

Now move onto the File nodes. For each texture file in the Color Balance section of the File Node bring the Default Color all the way down to black. This allows the add function on the layered texture to work properly.

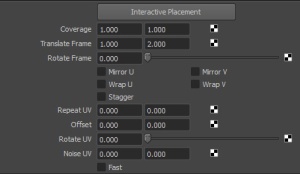
Now in the placement node for each texture you need to give the position of where that particular image resides in uv space. In my example the tiles I want are 0,2 1,2 2,2:

So for the 1,2 texture I want my placement node to look like this:

Also note that in each placement node you’ll want to turn off the Wrap U and the Wrap V.

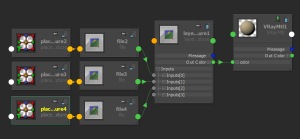
You’ll end up with a shading network that looks something like this:

And your model should be good to go:


Let’s go!

My name is Morgan and I’m a vfx artist. I’m the CG Supervisor and one of the owners of Scoundrel, a small but growing vfx studio in Santa Monica, CA.

Time for sharing. I’ve collected quite a few vfx ‘tips and tricks’ as well as coming up with some of my own along the way. This has been due to the generosity of fellow vfx artists sharing similar info on blogs like this. Inspired by these people I’ve decided to start giving back.

I’ll be covering topics related to the use of Maya, vRay, zBrush, xNormal, Mari, and Nuke. As well as talk about my ever evolving pipeline I use for my personal projects.

My hope for this blog is to simply provide answers to the questions I’ve had myself and that I’m sure other artists have had as well.